
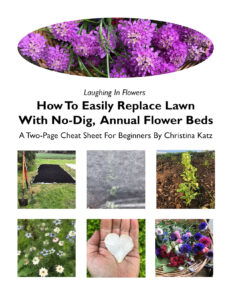
My No-Dig, Flower Growing Cheat Sheet Is Available For Only $9.99! Click Here To Download It Now.
Well, it’s the end of the flower-growing season here in zone 8b in Oregon. I have been practicing growing cut flowers for a couple of years now and I am definitely living a flower-filled life. In fact, I have more than enough flowers to share, which is always fun.
I have researched quite a bit of information online. I have also read a ton of books and watched a lot of Gardener’s World from the BBC. I thought I would give back some of what I have learned from real-life experience to those of you who are hoping, wishing and praying to fill your home with flowers next year. Here are seven things I have learned that I hope you find helpful. Consider them the broad strokes of what to consider before you plan a successful flower-growing season.
If you are looking to save money in the long run on starting to grow cut flowers or continuing to grow cut flowers, I hope you will check out these tips. Keep in mind that most of my growing tips also apply to vegetable and herb growing. I prefer growing flowers but you might be excited to know there are low-impact, inexpensive ways to grow anything you like, no matter what your garden zone. Why not give yourself a year to experiment with growing? I bet you actually do have a green thumb and you just didn’t know it.
1. Give Yourself A Monthly Budget & Stick To It By having a spending limit each month for your flower garden, you will be forced to prioritize your monthly purchases. This is important when you are just starting out because yes, you can grow cut flowers cheaply. Even so, you are going to need to invest steadily and the more you do the bigger results you will see in your garden each year. Even if you only spend $100 a month, you will be amazed at what you can build and grow. I would suggest starting simple and small. You can replace lawn with a couple of long rows of cutting flowers in your yard and you will be amazed by how many flowers you can grow from seed. Just don’t make your rows too close together and follow the advice in my no-dig flower garden cheat sheet when you are creating first your beds. Bye-bye, lawn! Hello, flowers all season long!
2. Buy Compost By The Yard I purchase several yards of compost twice a year and have it delivered from our local garden shop. I try to purchase it when the ground is hard, so I don’t have to worry about the delivery truck getting stuck in the mud, which has definitely happened before! I lay a large tarp down on the ground, have the driver dump the compost on the tarp, and then cover it with another tarp. I weigh down the edges of the tarp with old two by fours. In the fall, I cover my existing beds with compost to feed the soil and protect existing plants from freeze. In the spring, I top off old and new beds with a couple inches of fresh compost before I plant seeds. Check out my two-page cheat sheet for comprehensive instructions for building your first beds.
3. Always Be Gathering Seeds, Bulbs, Corms & Tubers Here is the tricky part about growing your first cut flower garden. There is no one time of year when you can access all the bulbs, corms and tubers you want. For example, you purchase daffodils and tulips anywhere from summer to fall, depending on how you purchase them. And you can purchase dahlias in the summer for delivery the following spring or you can purchase them in the late-winter and early spring in-person. Basically in the fall you getting first pick and in the spring you are getting varieties that are leftover after pre-orders. After a couple of years’ experience, I have decided to purchase locally except for a few mail orders of seeds each year. I am fortunate to live in a place where we have abundant supplies of bulbs, corms and tubers. It’s important to buy local and support local farmers. My advice to you is to make a few garden shops nearby your local haunts and visit them frequently so you get a sense of what products come through when. Always inspect the products you buy before purchasing to make sure they are not old, moldy or mildewy. Have a well-ventilated closet or enclosed space in a garage or shed for storing your bulbs, corms and tubers, so they will be nice and fresh when it’s time to plant them. Be certain not to expose your purchased items to mice, wood rats or any other critters who might find them delicious. And don’t forget good ventilation! In a future post, I will share a simple method for sorting seeds packets by planting time and tell you about all my favorite seed sources.
4. Use A No-Dig Approach Growing flowers is fun way to connect with nature. I think you will be amazed at the positive impact a small stretch of cutting flowers can have on your heart and soul, not to mention your family and friends and local ecosystem. I use an organic, no-dig method in my flower gardens, although these tips will work no matter which method you use. No-dig means disrupting the soil as little as possible when planting. But of course, if I have to dig a hole to plant a bulb or tuber, I will. Otherwise, I do not have a need to dig and this keeps the structure of my garden soil intact. If you have not tried no-dig, I encourage you to try it. It’s easier than you may think and is so much better for your soil in the short and long run. No-dig is also a lot less work than traditional farming methods. Check out my downloadable cheat sheet that can help you set up your very first no-dig beds. Making no-dig beds is so fun and easy, I would not be surprised if you don’t get hooked on replacing lawn with flowers. Flowers that come from a no-dig or no-till method of growing possess a magical quality that other flowers simply do not have. If you want to find out the difference, commit to a no-dig approach. You will be so glad you did!
5. Enrich Beds For Ongoing Productivity I plant my flower beds in waves. I start planting seeds at the end of February and plant the last wave in August. This means I have ample flowers all the way up until my first hard frost. But it’s not like I am busy planting all the time. I usually plant a whole row or half a row at a time. Then I don’t need to plant again for weeks in between plantings. When the flower-growing season is over, I chop my annual flowers down at the base, spread out a layer of newspaper and cover each bed with a couple inches of compost and finally a tarp or roll of weed cover. I have found that the time when I am not gardening is just as important as the time I am gardening. When I am ready to start planting beds I have already used, I will add a bit of Nature’s Intent organic fertilizer as well as some wood ash from my wood stove and coffee grounds we save from our morning habit. Before I plant anything, I top off each bed with an inch or so of fresh compost and direct-sow my seeds. Using this system, my beds stay healthy and fertile year after year with very little fuss. When you are direct-seeding your beds, planting in harmony with your best growing season is crucial. My method of planting is so relaxed and easy, I have plenty of time to check the weather.
6. Make Seedling Protection Priority One The reason I am so successful growing direct-sown flowers is that I have a simple system I use for early protection of seedlings. Nothing matters as much to me as protecting my seedlings until they are at least a foot tall. This system is outlined in my no-dig flower bed cheat sheet. I kept the instructions short and sweet so busy people can understand the concepts and plan on incorporating them into their flower garden plans. Three products contribute to my extremely high seed direct-sow germination rates: floating row cover by the yard, metal hoops for creating tunnels with row cover and slug repellant. Without these three supplies, I would have to grow my seeds indoors under grow lights or in a greenhouse and go through the arduous, back-breaking process of hardening-off and planting seedlings. My flower gardens grow in a simple four-step process: bed preparation, direct-sowing and seedling protection. Once flowers are established, all I have to do is water them. That’s four steps. The rest is flower heaven. And here’s the kicker: all that push to grow seeds indoors and all the fuss and mess and spending that go with it–you don’t have to do that. Will my direct seeding system work work in your gardening zone? You will have to experiment to find out. But you may as well try it before you spend all that money on a greenhouse or the materials for starting seeds indoors!
7. Borrow This Plan For First-year Success You can have a spectacular garden in year one if you use this simple plan and follow the instructions in my no-dig cheat sheet. If I were to start growing over again, here’s what I would do. I would plant one 30-foot bed for hardy annuals perpendicular to the trajectory of the sun. Then I would plant another 30-food bed six feet away from that bed for the second wave of hardy annuals. Then I would plant another 30-foot bed for tender annuals six feet from that bed. Then another for the second wave of tender annuals six feet from that. Finally, I would plant one more 30-foot bed for bulbs, corms and tubers. I grow daffodils, hyacinth, tulips, Siberian irises, and dahlias, which blossom in that order. By planting in waves, in long rows that are direct-seeded 3-feet wide and six feet apart from each other, it’s easy to irrigate or water beds by sprinkler or hand. That’s only about a 30-foot by a 40-foot space. You can totally hold off on purchasing irrigation until your second year growing flowers, if necessary. Just plan on watering in the evenings, after dinner. You can grow a ton of flowers in beds a fraction of the size I just recommended, so go ahead and adapt this plan to 10-foot long beds or 20-foot long beds, if you want. Just be sure to always leave six feet between rows. Otherwise you won’t be able to get between your rows at the height of the season. Keep in mind, less longer rows will be easier and cheaper to irrigate than more shorter rows.
If it’s your first year growing flowers and you want to be amazed by how much you can grow primarily from seed, mark off space for your beds now and gradually prepare the soil between now and January, February or March–whenever the weather is appropriate to start direct-sowing hardy annuals in your zone. My helpful two-page cheat sheet can help you grow flowers wisely and in harmony with nature. The earth will thank you and you will feel that renewed connection with mother nature from your very first day practicing no-dig gardening.
Maybe people avoid earth-friendly practices because they think they are too hard or too expensive or too yuppie. But no-dig flower-growing techniques are actually easier, cheaper and more socially responsible than what we have inherited. In fact, if we all moved in this direction this coming year, we could make a global impact, just by growing beautiful no-dig flowers. The birds, bees and butterflies will thank you so kindly your first year growing, you will never look back. Future generations will also thank you for gardening sustainably.
Thanks for reading all the way to the end. I hope these tips are helpful and inspiring. Happy gardening!